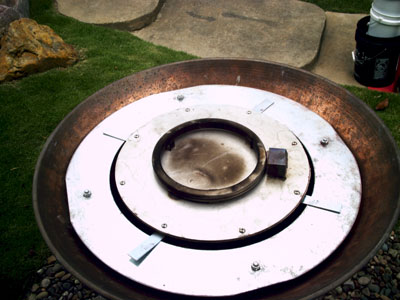
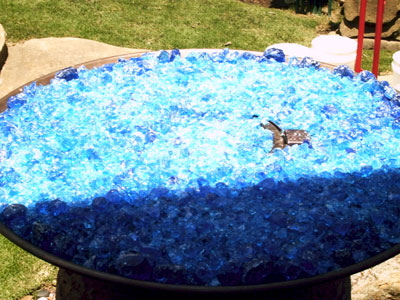
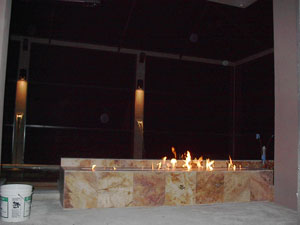
On the bottom front left of the pictures you can see the blue battery compartment. This will be just slightly covered with glass but easy to find come the time to replace the batteries. First layer of glass going on. Below you can see that the ignition is just above the surface and the battery box is now gone!
Below we did a Paparazzi photo shoot! This home took 2 years to build! The gates below had Sea Glass laminated to the glass panels. If you take notice to the outside walls, the entire house was covered in marble! Crown moldings included!
We can build these fountains for you to install yourself or we can aid you in building your own. We can help you design and or build your fire and water feature. Finished and evening pictures still to come!
The fire pit below is from Scott Woods. He installed a Starfire Base Glass and Topped it with Copper Blue Topper and Cobalt Blue Topper.
The portable fire table/ pit below was built by Kris Day. This is a portable Propane Fire Pit and he installed Azurlite Base Glass. This is a fairly simple project that we can help you build by monitoring and supplying the correct parts. From the start here we go:
From start to finish, propane or natural gas burners with or without a pan, we can help you build your own.

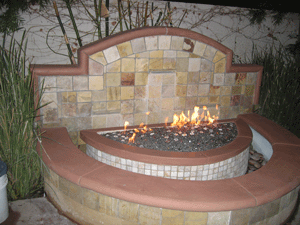
The next fire pit below has one of our FPPK's installed. We didn't supply the star burner burner we did get it to burn correctly with a Ford Blue Base Glass. Then it was Topped with Clear Diamonds and Blue Diamonds. We will explain as we move on. Below you can see the gas shut off on the left and our FPPK box on the lower right.
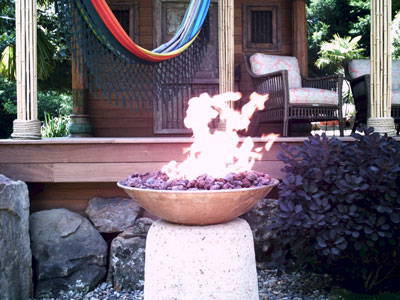
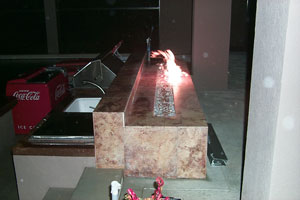
Below you now have fire! It was a bit windy but you get the idea.

The next propane fire pit below was built and installed by Kevin Smith. He used an outdoor stainless steel burner that was calibrated to insure a clean burn.
Beware of companies out there who sell propane burners, but no nothing about how to safely and cleanly burn glass. Because when you have any issues, and you will have issues, you'll find that they just seem to never call you back.
Below you see the stainless steel burners on a bed of crushed pea gravel inside a hollow cinder block; which serves as a pan for the propane burner.
Below you can see the Copreci and air mixer mounted to a bracket on the end of the pit. Remember, the Propane air mixer needs a great deal of care.
The glass that was installed was Ford Blue Base Glass.
Done, simple and nice!

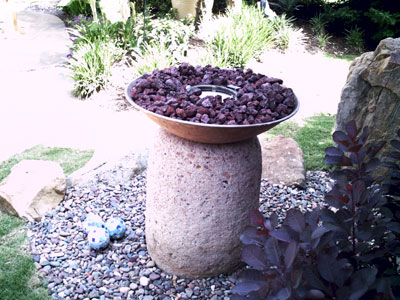
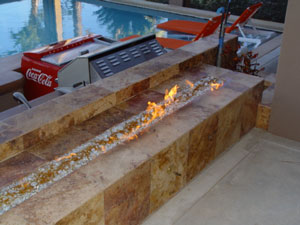
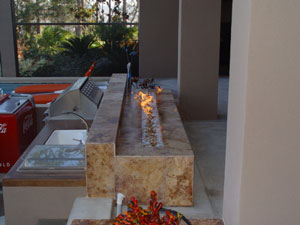
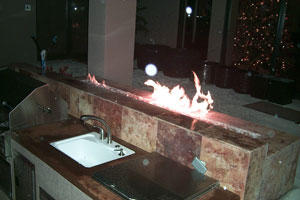
The fire pit below is a propane fire pit. Notice that there is no soot! If you do it right, then it is done right! We are very proud of this fact. The base glass is a Starfire Base Glass topped with a Copper Blue Topper. On the picture below you can see the Propane pilot cover/ blow out box at the bottom of the picture. When I received these pictures I didn't understand the dark chunks???? The customer was being creative and dropped in a few chunks of lava.
This particular Topper is a Copper Blue Topper, meaning we use copper and chrome to manufacture the glass. What this means is that when the glass gets hot, it turns green (because of the copper) and when it cools it returns to blue (because of the chrome). We actually have almost 30 colors which change colors. We hope to introduce these chameleons in the near future. But for now they are just hiding amongst the other colors.

The fire pit below was designed by Tim Warden of Orange County, California. We helped finish the design/ build of this fire pit.
We will explain as we go forward:
Start with a cantilever design off of the deck overhanging the hill side.
Close up of the control valves. Two valves to control two burners. Don't expect to push gas into a massive burner then hope it goes where you want it to??? This helps equalize the pressure to each burner. Below the plumbing is now finished. Test burn
We used two 50" "T" burners in #304 Stainless Steel. Copper cladding was added to the top portion and wrapped in water proofing material. Durock (cement board) was added the the lower portion for an application of smooth stucco.
Ford Blue Base Glass was added with Ford Blue Reflective Base Glass. Starting to look nice! Real Nice! No that's not Marijuana in the back ground! The 1/2" glass panels get installed with stand off clips on the back side so you don't see the installation.
Looking from across the pool, very cool!

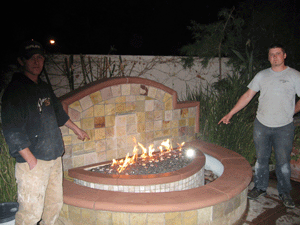
The fire pit below was designed and built by Tamara Lyons and her wonderful family! Junior help most. The glass that was used is:
Bronze Rust Copper Base Glass,
E.D. Diamonds, Red and Orange,
Amber Diamonds,
Orange R140 Topper, this particular color is one of our chameleons. It turns a bright cherry red when heated and cools back to orange when cooled!
The fire pit had three sets of burners. One in the center and one on each outer edge. This way you can control how large, how much and where you can have fire when you want it.
This is how it started. Pea gravel base. Measure once, cut twice.
Ohhh, what color?? There are sooo many. What to do?

So we sent a make up of what colors they liked. We can do this for you as well. Just tell us what colors you want and we will mix a batch and send you the pictures!
You should of seen the rest of the back yard! Who needs a house! I would live in the back.
The next fire pit was created by Mike. He used a metal flower pot/ planting tub and just connected it to his gas line. He installed
on top. You can see the logs just outside of the pan on the left, yuk! I personally would of installed a ring burner, but that is just me! But you have to admit, it is a good idea!