They drilled for the trimming valve to be installed.
A picture is worth a thousand words, and here you have it.
The fire pit below is going to be installed in Sacramento on 11 14 09 for the Yard Crashers/ DIY/ HGTV show. After it is and has been installed we will post pictures on the Yard Crashers page. In the mean time here is the how to and why. We can build any size, shape, design feature you desire. We build to your imagination. Below is the catch basin to hold the water for the feature. Above you see the auto fill? Below the water pump is now install below.
Below the top pan is in place for testing with the fire and water bowls in place.
Below the stainless steel ring is installed. Below the glass (Bronze Base Glass) has been installed and the lights turned on. Below you can see the pump has been turned on.
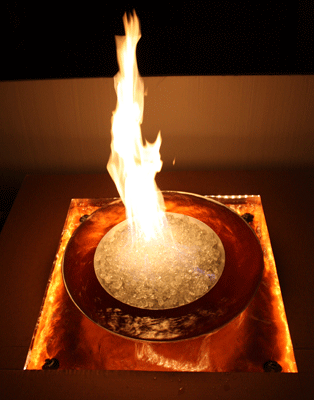
And now the fire. We placed a card board template to replicate the table top to conceal the lights as well.
Now we add color to the water!
Here is the feature exposed with the blue water. You can change the water to any color you like. This feature is only 6 1/2" tall. You can mount this under the table top and keep it only an inch or so above the surface of the table top. This feature is only 6 1/2" tall. You can mount this under the table top and keep it only an inch or so above the surface of the table top.
So let's change it to red water and add Starfire Base Glass.
Remember, we build to your imagination!

The Fire Table below was installed in Sacramento California by and for Yard Crashers. The finished pictures will be posted on the Yard Crashers page when this project is installed after 01 20 10. This episode was to be labeled "Outdoor Shower" on HGTV and the DIY Network but somehow it was labeled "Modern Fire Wall" go figure? It is episode 302 on HGTV or DIY Network. The details will be shown on the DIY page when and as soon as we receive them from the producers. We built a square aluminum pan with an 18" double stainless steel ring and used one of our FPPK kits for the propane fuel. This will be shown on the episode coverage as well. Here are the pictures of the back yard and the finished fire table using propane.
The fire pit below was built to the customers specs. It was 48" round, 10" tall with 8" legs and constructed from 1/4" aluminum. Then powder coated to match the customers request. The center leg was for the gas and electrical for the electronic ignition.
Above you can see the cross grid to support the false bottom.
Above you can see the false bottom making it possible to fill it with a 2" fill over the ring. A custom 42" stainless steel burner had to be built.
The next Water Over Fire Feature can be made in any configuration, size or shape. We can install it in a table or leave it as a stand alone feature. What ever you like. This particular bowl is a spun aluminum 30" bowl with a 26" water ring and about 100 lbs of Multi Mix Base Glass. We added a few of our Terra Cotta Fire Balls in the center.
The next fire pit was built for Chuck Krallman in the Bahamas. The challenge was 15 knots per hour trade winds and propane. Not a problem. We mock up all of our projects to insure that they work properly. We first start testing the venting and use cardboard or plywood only later to be replaces with 1/2" glass panels.
Proper venting and maintaining an upward draft is very important.