Video 1:
MFire Water Bowl 1 from Edgar Jaunzemis on Vimeo.
____________________________________________________________________
Video 2:
Fire Water Bowl 2 from Edgar Jaunzemis on Vimeo.
____________________________________________________________________
There are dozens of options when building a water fire feature.
What grain on the brushing?
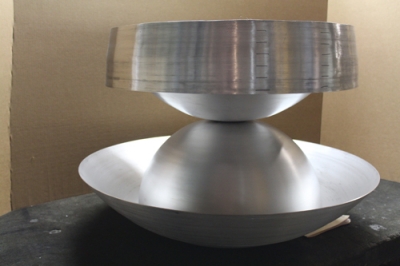
The top ring is a coarse bush
The bowls below are a very fine brush pattern.


The two bowls below have been re-spun and brushed with a very fine grit

Is the bowl to sit on top of the table top?


How high above the table top surface?


Or would you like to under mount the lower bolw below the top surface?

These lines represent where we need to cut the drip redge, 1", 2" 3"?????


Then testing starts.


How high is the water ring?
How high is the second base bowl in the lower bowl? In this case the second bowl is actually elevated 1" off of the bottom bowl.
The pump and auto fill is located inside of the second bowl. There is also lighting coming out from under the second bowl.
We installed lighting under the rim of the upper bowl as well.

More testing and adjusting

Water flow testing and if you notice, the metal is now clear coated with powder coating


There are many variables (not shown) as to what it really takes to build one of these features and have it work as it is supposed to.

Now add the glass of choice


Turn on the gas and light it up!


You need to make sure the water "SHEETS" properly.
_____________________________________________________________________
"CLICK HERE" to see how it was made or "CLICK on the PICTURE" below

_____________________________________________________________________
When you turn it off, the back flow valve must work properly to prevent overflowing.


____________________________________________________________________
Video 1:
MFire Water Bowl 1 from Edgar Jaunzemis on Vimeo.
____________________________________________________________________
Video 2:
Fire Water Bowl 2 from Edgar Jaunzemis on Vimeo.