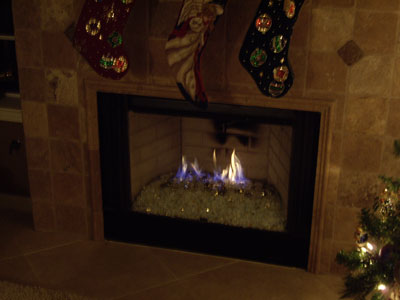
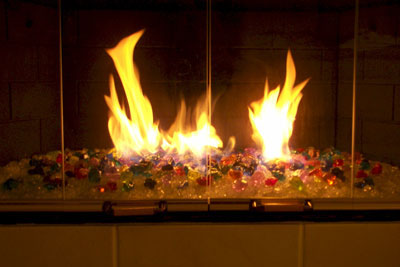
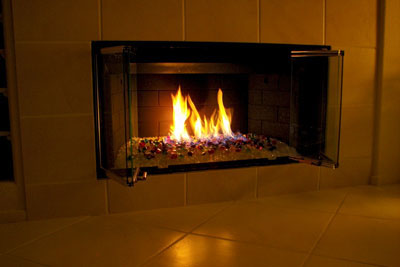
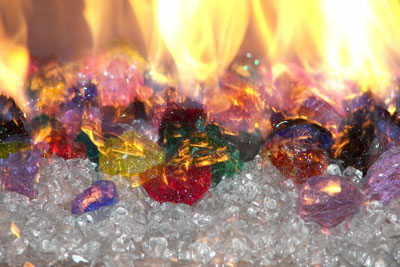
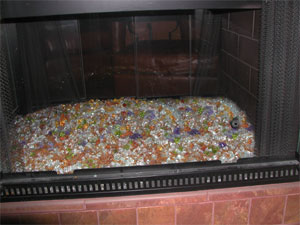
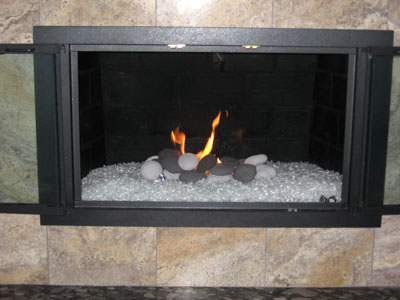
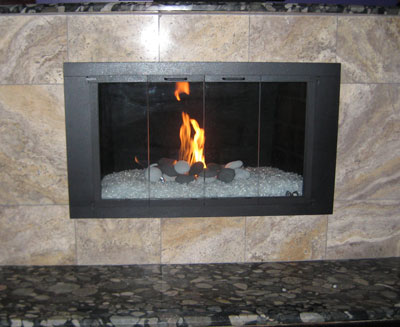
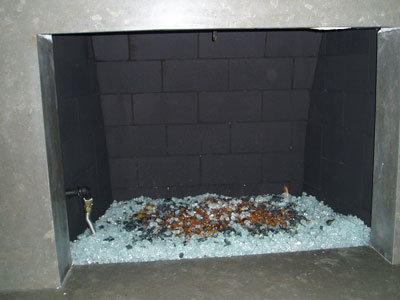
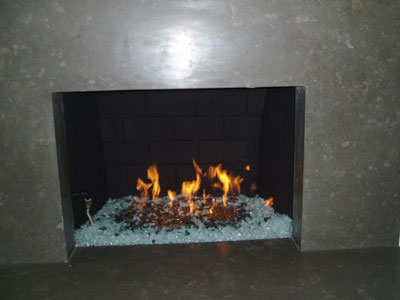
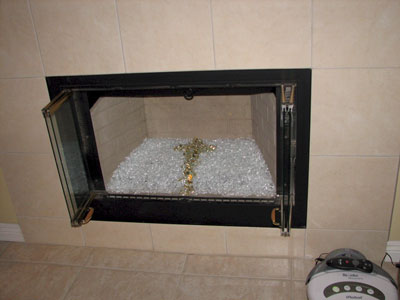
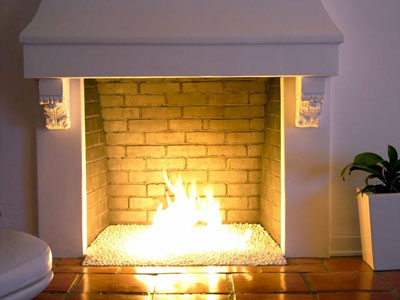
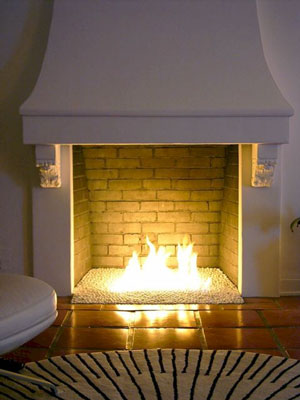
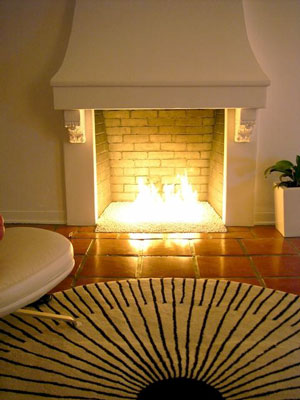
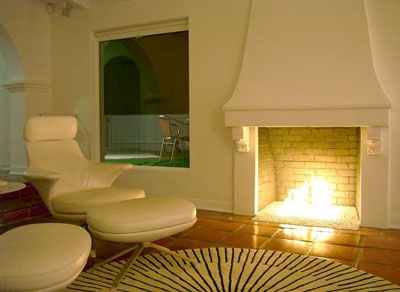
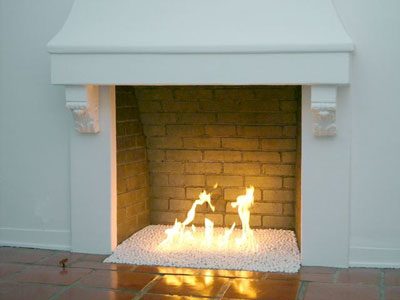
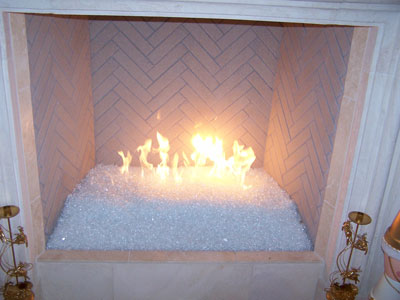
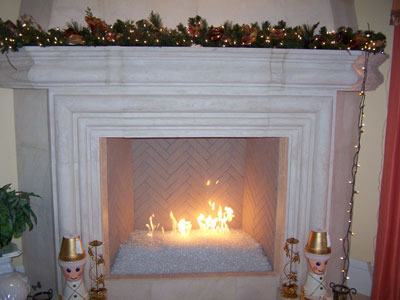
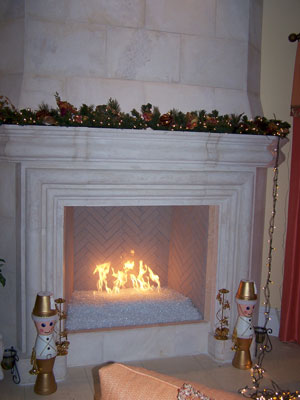
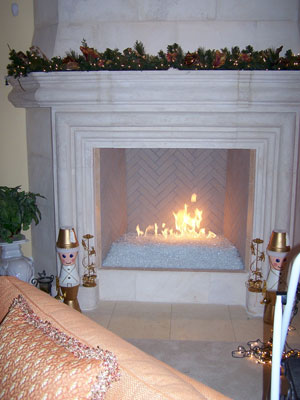
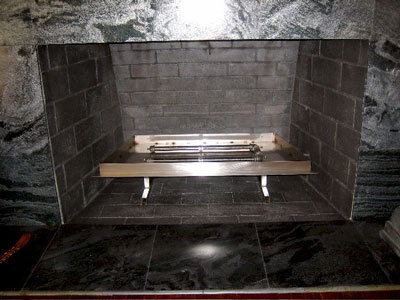
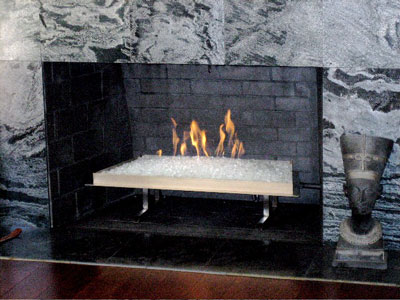
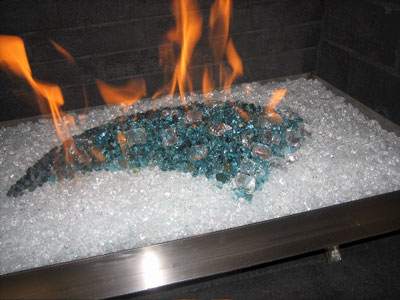
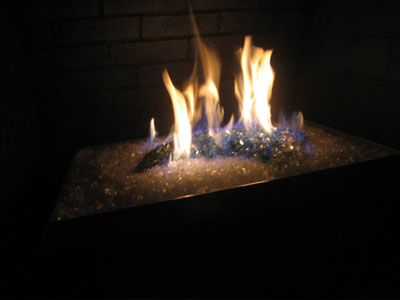
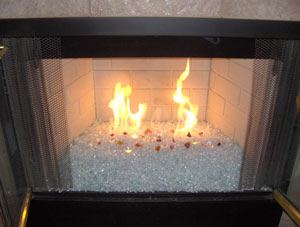
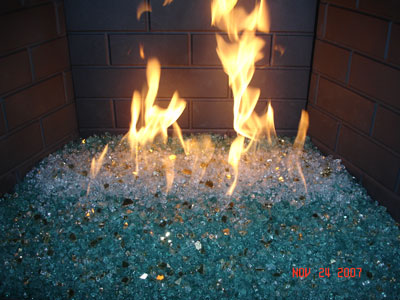
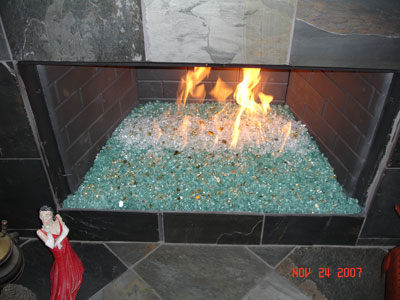
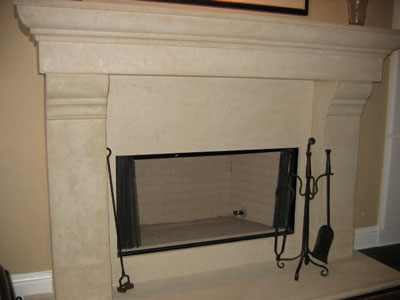
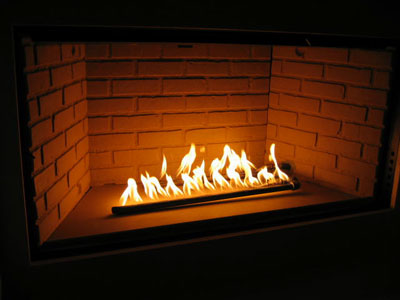
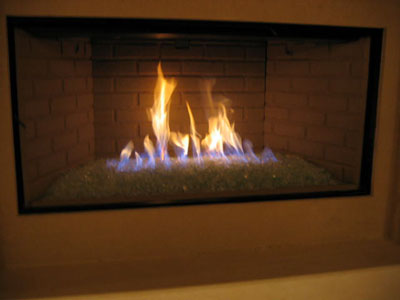
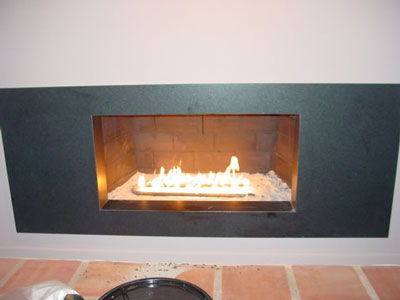
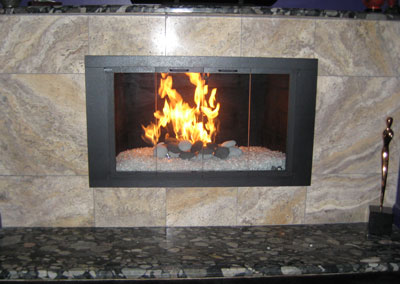
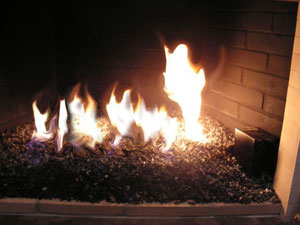
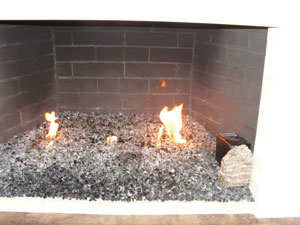
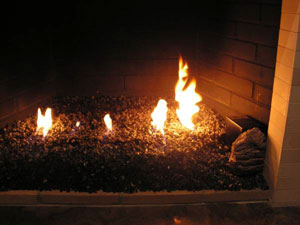
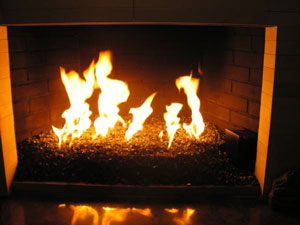
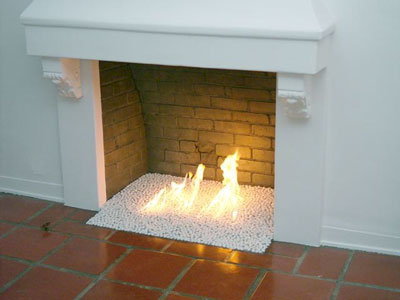
The fireplace below is a before and after and a "how to" make it low and lean. A more contemporary look. This is a self install by Rich Kamins and one very nice job!. He used a Bronze Base Glass and Bronze Reflective Base Glass. Topped with a bit of Starfire Base Glass. Ice Ice Ice Topper and about 2 pounds of Copper Ruby Red Topper for a splash of color.
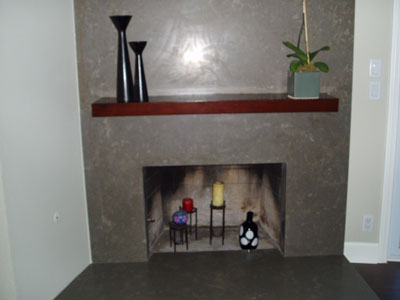
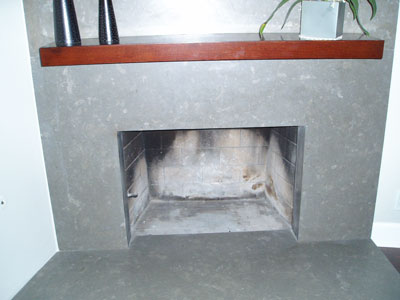
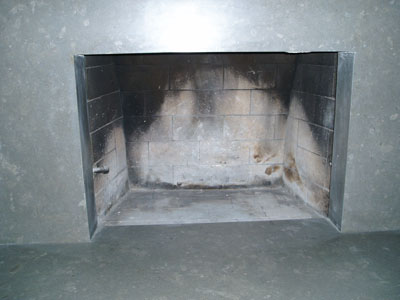
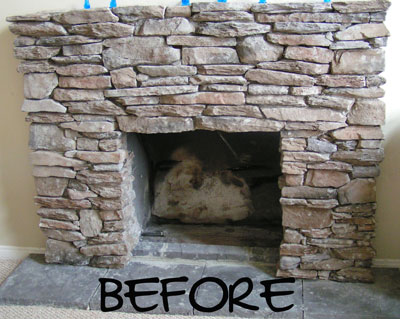
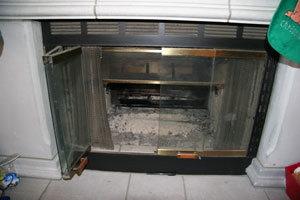
Typical nasty fireplace before Moderustic!
Now to the fireplace pictures!
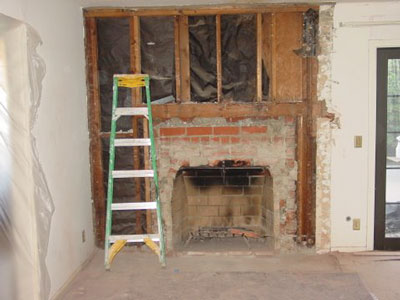
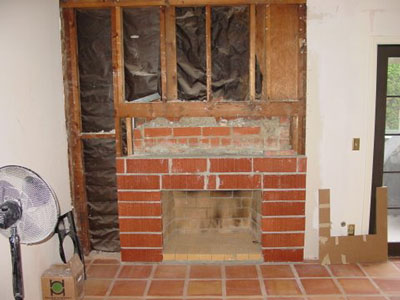
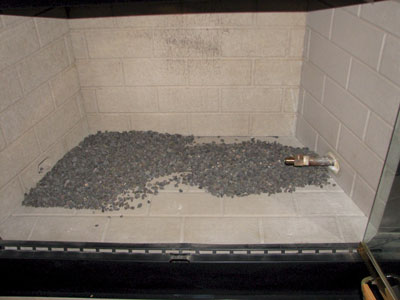
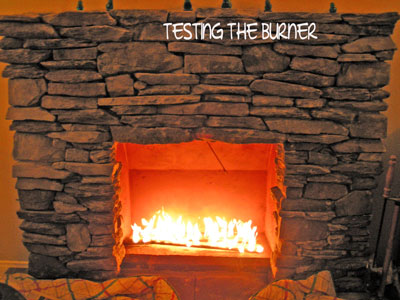
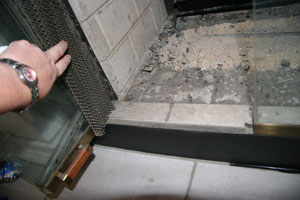
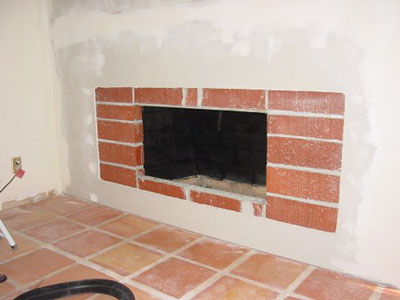
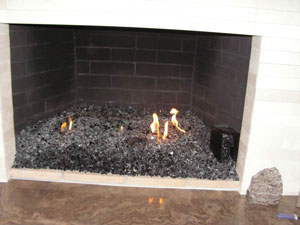
A few bricks and some drywall
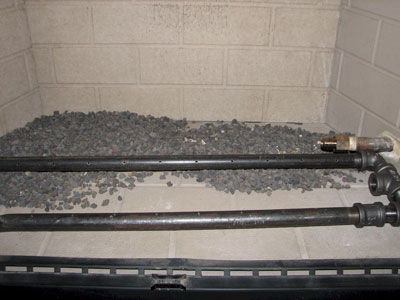
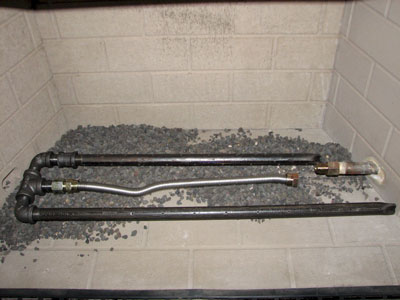
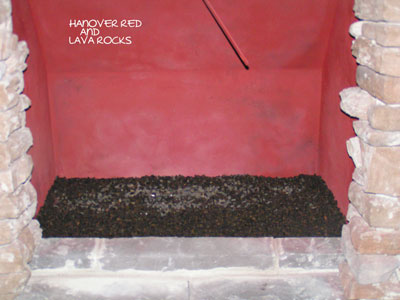
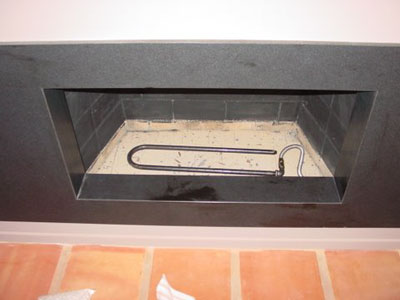
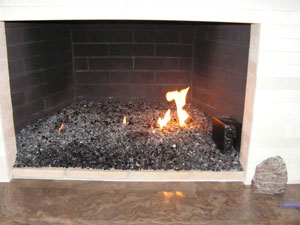
Some sand under the burner for filler to raise the base glass.
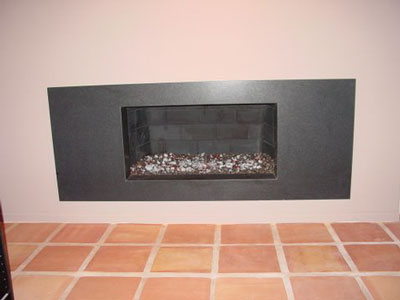
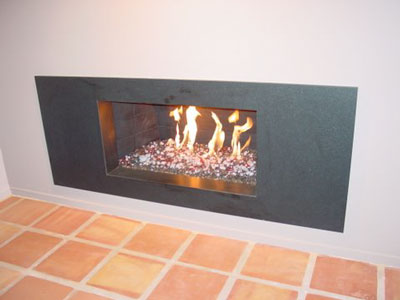
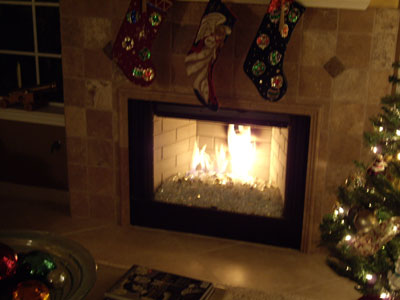
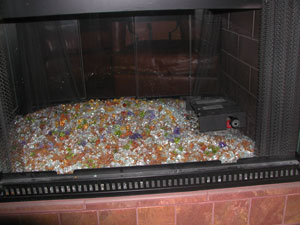
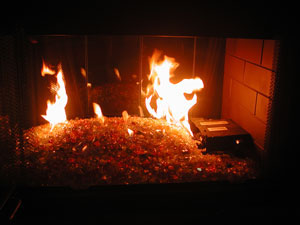
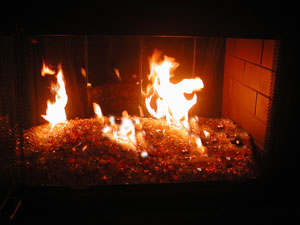
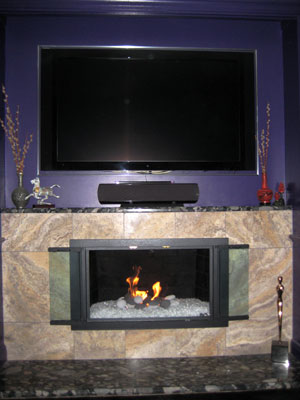
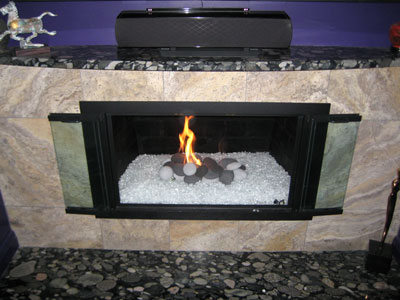
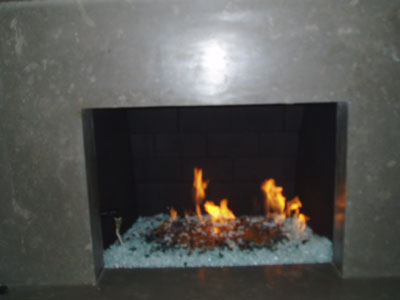
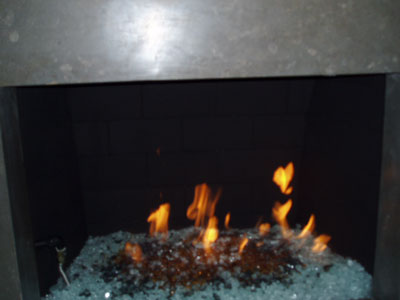
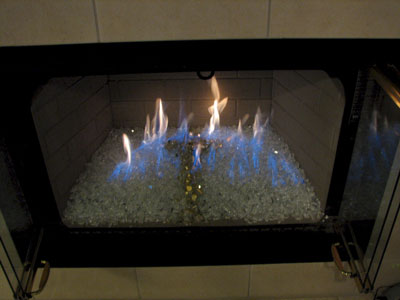
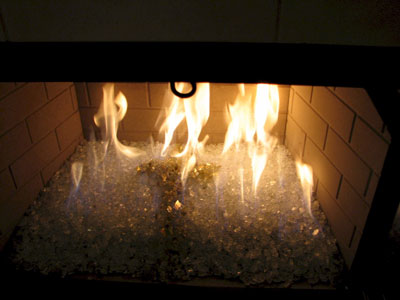
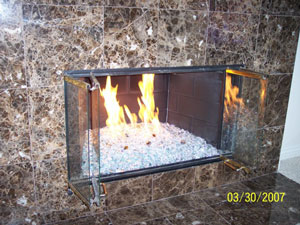
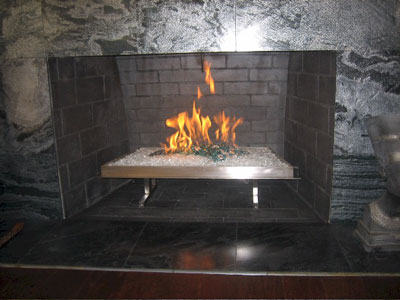
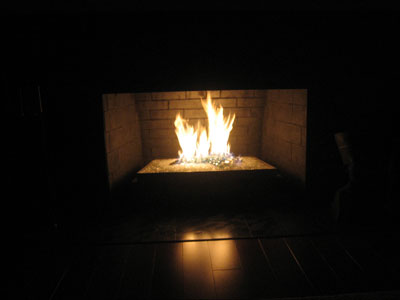
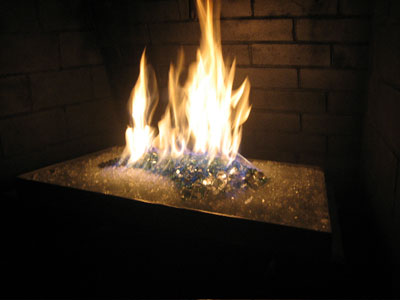
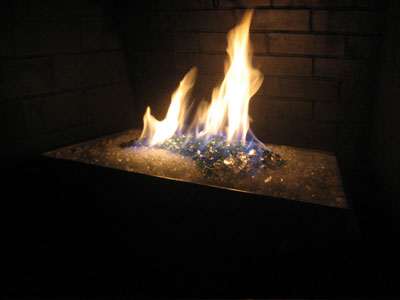
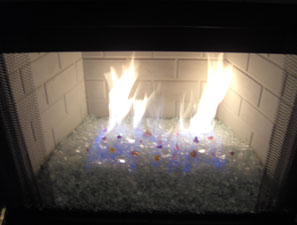
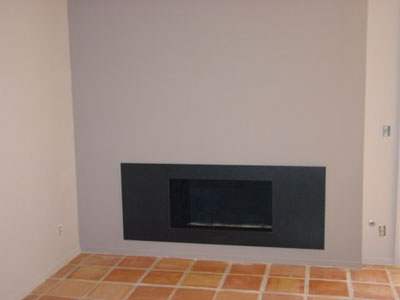
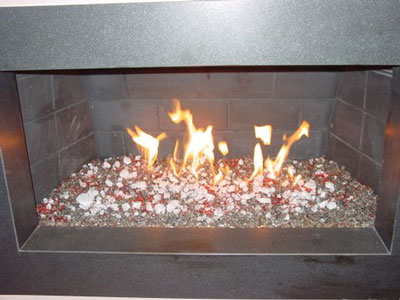
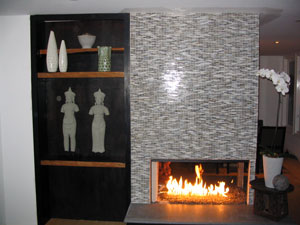
And here you have one nice finished fireplace.
______________________________________________________________________
Click HERE or on the picture to see how it was transformed to this!

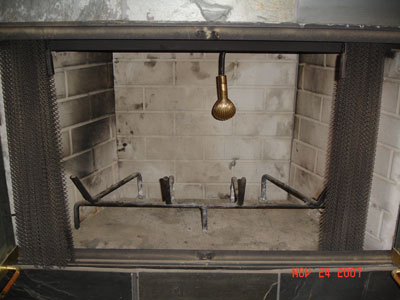
From THIS! (BELOW) again YUK!

______________________________________________________________________
The fireplace below has a mixed base of:
here are the pictures from start to finish, a couple of the pictures were a little fuzzy from the customer. Oh well.
Now typically is your fireplace looks like yuck, put candles in it and everyone will tell you how nice it looks! NOT! So don't do it! If it's dirty or looks like a skid mark, clean it and or paint it but don't put candles in it.
A typical fireplace where Fake Logs used to live. Now they are residing in the Fake Forest after leaving nice black skid marks on the walls of your fireplace, nice! Actually the soot you see in your fireplace is carbon monoxide but the fireplace manufactures which manufacture the Fake Logs just don't seem to tell you this little fact! It's poison and it's the furthest thing from being green that you could ever get. If you really still like Fake Logs then just sit in your garage with your car running and entertain your friends and family there. It's just a healthy.
The customer here could of painted his flex line to help hide it a little better. Again what was the plumber thinking, hanging logs? Maybe that's why we plumbed the line so high in the air?
Anyway after all of that it did turn out nice.
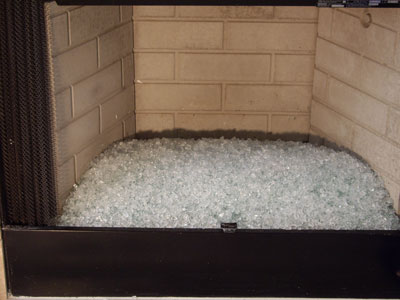
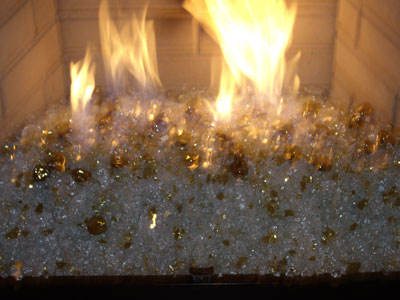
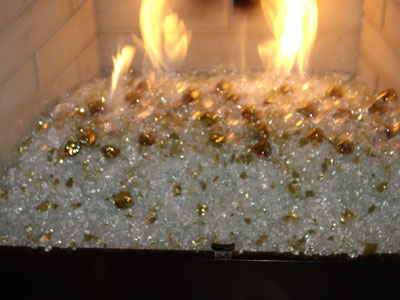
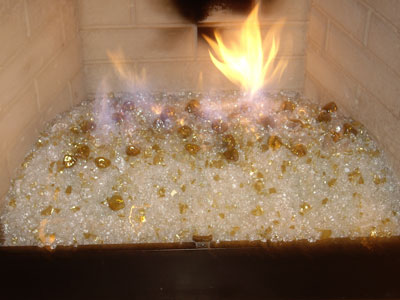
The fireplace pictures below are a self install with a 2" layer of crushed lava and 2" of
Starfire Base Glass on top. They used an 18 24 double burner and splashed 2 lbs of
Gold Base Glass in the center.
Above you can install the burner with the flex line curling back under the burner or below
you can use a longer flex line or add a nipple. Which ever you prefer.
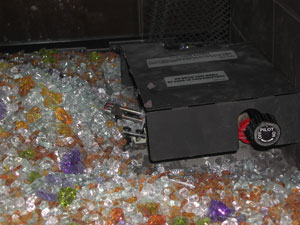
The fireplace below was a wood burning fireplace and the plumber never installed a key valve in or near the fireplace. So we made a fireplace key box which was installed on the right side of the fireplace. This is the only alternative when the plumber can't or won't fix the issue. So remember if your plumber installs a valve inside of your fireplace, ask him "how do I turn it off?" That's when you will see him run down the drive way. The glass that was used in this fireplace was
Starfire Base Glass.
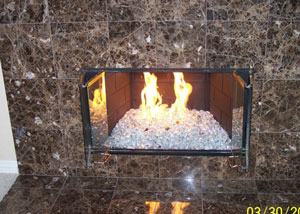
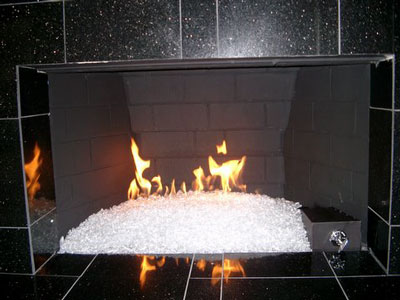
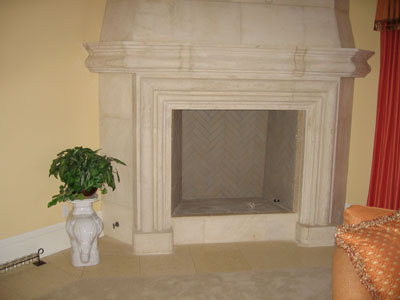
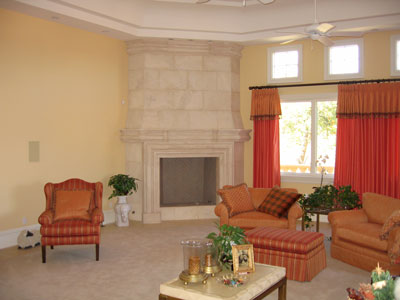
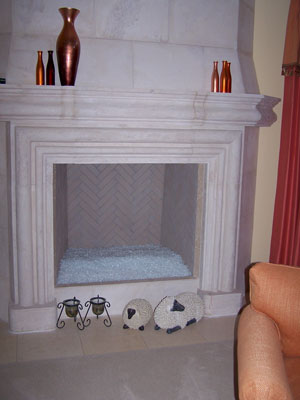
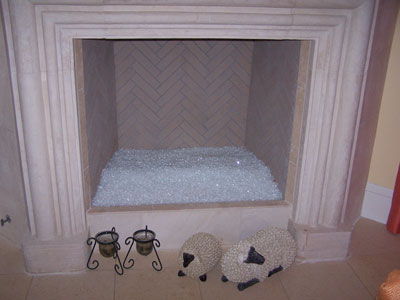
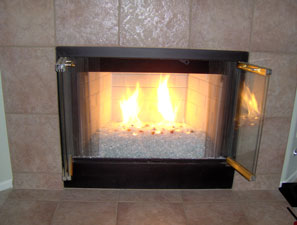
The fireplace pictures below has a base of Bronze Base Glass with Bronze Reflective Base Glass and Starfire Base Glass on top.

This is the back side of the peninsula fireplace.


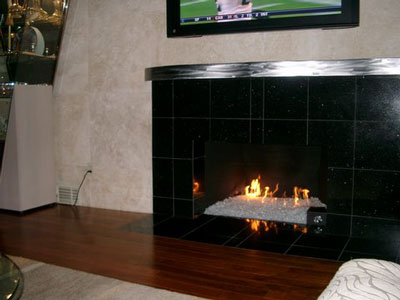
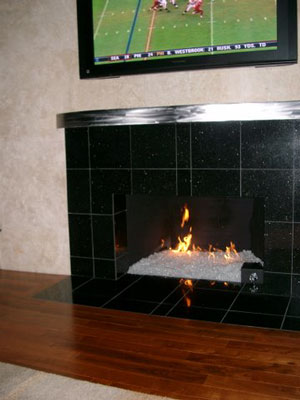
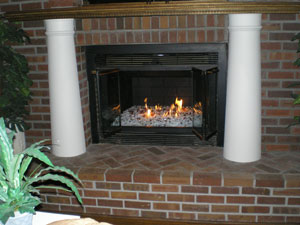
The fireplace pictures below has a Bronze Base Glass with Starfire Base Glass on top. The customer installed a Maxitrol remote control on the right side
If they would of used more filler it could of covered the remote at least on the top portion.
Putting a ceramic pine cone in a glass fireplace defeats the purpose, you think? I would of used a a fire stone or even a fire ball.
Very nice, can you even imagine putting logs in ever again?
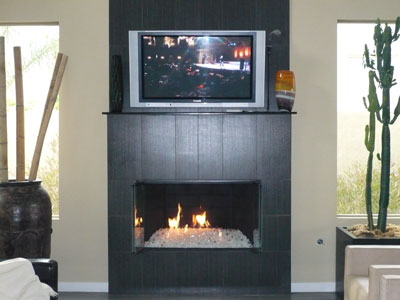
The fireplace below has a
Starfire Base Glass and we just sent samples out for some real wild colors! We will post these when they are available. In the mean time, one nice fireplace in Arizona.
The fireplace below was installed by George Foote who also built his own pan, great job! We supplied the burners and glass and George supplied the talent and labor. Great job George! The colors used were:
Before the pan and glass.
Here is the stainless steel pan that George built.
and the rest of the colors for one nice design from George!
In our opinion we would of removed the screen and doors for a much cleaner look, what do you think?
Here is a glimpse of what it used to look like, yuck!
You have to try to understand, we see this transformation everyday and we still don't understand the lure to fake logs, do you? Take a closer look at your fireplace, is there anything nice about it in the daylight?
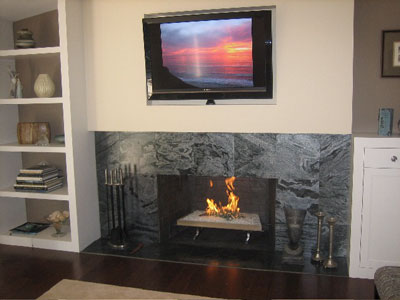
The Fireplace below belongs to Candice, Jonathan and Rocky (a cute little Yorkie). We converted a plain fireplace to a much more usable and modern fireplace TV entertainment area. Watch the transformation from beginning to end. We topped it with Starfire Base Glass to finish it off.
Below is Rocky, just supervising
We started the metal framing in 16 Gauge steel studs. No wood was used and you should never use wood near a fire.
Below we wrapped the opening with durock, concrete board.
Add a bit of drywall.
This was wired for a surround sound and electrical in the left cabinets.
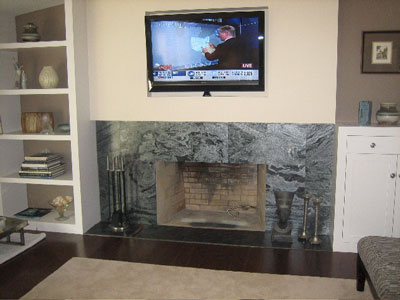
The TV that was used was a DPL (16" deep) and this is how you install a TV that is not a flat screen above your fireplace. In the left cabinets the components were installed and concealed by black glass doors. On the top we installed a set of 6" lights on dimmers to give additional room/ mood lighting.
If this was in your house you would say NASTY!
Burning wood and logs is just nasty and dirty! True story!
Above you can see the soot that come out of the fireplace and and leaves your house smelling so carbon monoxide fresh! YUCK!
Add a bit of lime stone.
A few pieces of copper.
Below you can see the sand bed and the ignition box we built.
Below are the two vent we installed for the air mixers inside of the ignition systems.
and here we are finished. Now isn't that much better little feller?
Modern times call for modern measures! I guess that's why we are Moderustic!
The fireplace below is in Santa Monica California. The fireplace is a Malm Fireplace which can be found at:
We used an 18" double stainless steel burner and a bed of
Starfire Base Glass topped with a few pounds of our
Ice Ice Ice Topper.This is a very simple self installation as you will see.

The RV fire pit pictures below and table was built by Kevin Harren. He pops the fire pit out when he goes camping and drops it back in the table he built when at home. Pretty cool idea! The glass he used was Starfire Base Glass.

The fireplace below is in Venice Beach California. This is a direct vent installation and we will now show you how easy it really is. For all of the installers out there who say it can't be done, well here you go. Pay attention now! Read below for more details.


The glass that was installed was Starfire Base Glass.
The house is and was under construction so please excuse the debris around the fireplace. The pictures explain what we did. We didn't change the amount of fuel (btu's) being burned just the way it looks. Flip the switch, the ignitor lights, allowing the gas to come up through the burner and the pilot light lights the gas rising from the burner below. As for the doomsayers that tell you this can't be done, Oh Well! This will be our little secret. If you have any questions on your conversion please send us pictures and we will help you convert your direct vent fireplace as well.
Most fireplace manufactures will tell you this will void your warranty. But you need to actually read the warranty to understand what they will or won't cover. The person telling you this at the factory, ask them what the warranty actually implies. We have read many of these warranties and they won't cover the fireplace anyway. These warranties were written by attorneys to keep the liability from the manufacture and lay the blame on the consumer at any expense, no really read one.
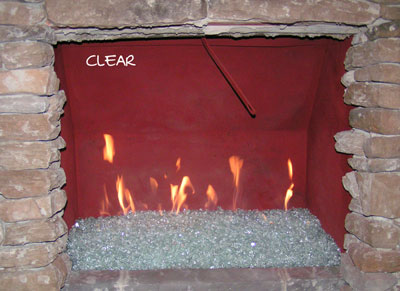
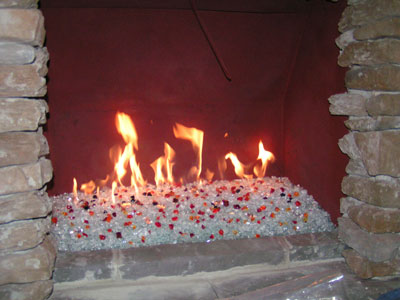
The fireplace below is in Laguna Beach California. The glass that was use was Starfire Base Glass. Topped with Clear Diamonds and Ice Ice Ice Topper.


The fire table below was built for Dr. Ramsey Burton in Kentucky. We are going to show you from beginning in the shop to the finished product that Ramsey envisioned for his patio. Ramsey did a wonderful job in planing, building and execution of this project. The glass he used was a
Starfire Base Glass with
Ice Ice Ice Topper on top. Here we go:
Now for the fire pit pictures!
This was the lay out for the table to come!
these were the pictures we sent Ramsey after assembly and testing of the fire bowl, water pumps and fibre optics. The glass we tested with usually is our
Multi Mix Base Glass. It tends to show off many colors and always looks great.
Above you can see the gas line and electrical
Access panel below.
Below the bowl was fitted.
Don't ever forget to install a trimming valve!
There are 6 colors on Ramsey's color wheel in the fibre optics.
Above and below you can see the cover Ramsey have made to protect the fire table when not in use.
Great job Ramsey!
The fire pit below had the wrong type of burner let alone the location of the burner.
The burner must be with in 2" of the ultimate top of the surface of the fire pit. Filling the pit with gas and then trying to light it? Nothing good can become of this. We installed a #304 stainless steel "H" burner, covered it with crushed lava (1/4" / 3/8") over the larger lava rock. This is what keeps it from trickling to the bottom. Them we topped it with
Starfire Base Glass. Then Eric is trying to decide which colors/ topper he should add if any at all.
Wrong type of burner above.
Our "H" burner below. Watch the flame pattern as the crushed lava covers the burners.
Now for the big decision, more colors and which ones?

Las Vegas Yard Crashers!
This will air in April of 2010!
Here is a preview

This is what was done on the first day. I showed up on the beginning of the second and the final day. It's amazing what can take place in just 12 hours!

Above the pavers were installed the day before.
Below is the patio with the outdoor kitchen set aside for now.


Above is where the outdoor kitchen will reside later.
Even the palm trees were brought in! There was nothing on the site when it started the day before.

Below Ahmed was leveling the ground around the fire pit area. Ahmed worked all day, much harder than anyone else! I was very impressed how hard he actually works to get the show done.


Below is where the propane fire pit will sit. The controller will be mounted to the side of the concrete base after the paper tubes are cut away.


Above and below you can see the inside of the planter is coated to prevent water from leaching out.

Above you can see on the ground that we brought the fire bowl in. Just so you know it was about 300 lbs!


Above and below you can see outdoor kitchen. The trough coming out is actually water fall spilling into a dry creek bed below. The water feature was covered with a glass top making it a dining area as well. On the inner wedges they wrapped rope lights to accent the water and rocks under the glass top.


Above and below you can see the sand was installed as a base for the artificial grass to come.


Above they are compacting the sand for the grass to be installed.
Below Ahmed is finishing the dry creek bed.

Below the grass is installed.

Below the dry creek bed is finished and the grass is now installed in the back are as well.


Above is our fire bowl on propane. We used Starfire Base Glass with Ice Ice Ice Topper and Diamonds on top. We brought out several colors of diamonds for the customer to pick and choose but she liked them all so much, she installed every last one!

Below you can see after everything was cleaned up how spectacular it turned out!


We are to feature several more episodes with Yard Crashers and we will be showing several more of our new product lines on their shows. We still have several shows we need to post pictures of what we did. Please come back from time to time to see our latest updates.
I thank Ahmed and the producers of the Yard Crashers for giving us the opportunity to work with them.
Thanks to Tiffany, Krystal and Holly at the Big Table Media!
Big Table Media produces Yard Crashers for the DIY Network
The fireplace below belongs to Todd. As you are going to see one great before and after transformation.
He used an 1/8" Clear Base Glass with Starfire Base glass on top. Then he added Red R Topper, Black Luster Topper and a few Clear Diamonds.


Out with the old and in with the new!


We would of liked more pictures of it burning but Oh Well!

Below is a collection we took pictures for our customer to decide on which base to use under the Amber Diamonds.
Amber Diamonds alone

Amber Diamonds on Black Base Glass

Amber Diamonds on Starfire Base Glass

Amber Diamonds on New Yellow Base Glass

Amber Diamonds on Bronze Base Glass

The same product can be displayed thousands of ways. What do you want to see? Our diamonds are made with a convex base so when you look at the Diamonds in the fire they seem to be melting on the inside, like looking into a spoon. We cause it to reflect backwards. Visit out "Diamonds Page" to see many more colors!
The fire pit below is going to be installed in Sacramento on 11 14 09 for the Yard Crashers/ DIY/ HGTVshow. After it is and has been installed we will post pictures on the Yard Crashers page. In the mean time here is the how to and why. We can build any size, shape, design feature you desire. We build to your imagination.
Below is the catch basin to hold the water for the feature

Above you see the auto fill?
Below the water pump is now install below.

Below the top pan is in place for testing with the fire and water bowls in place


Below the stainless steel ring is installed.

Below the glass (Bronze Base Glass) has been installed and the lights turned on.
 .
.
Below you can see the pump has been turned on.

and now the fire.

We placed a card board template to replicate the table top to conceal the lights as well.

Now we add color to the water!


Here is the feature exposed with the blue water. You can change the water to any color you like.


This feature is only 6 1/2" tall. You can mount this under the table top and keep it only an inch or so above the surface of the table top.

So let's change it to red water and add Starfire Base Glass.


Remember, we build to your imagination!

The finished pictures will be posted on the Yard Crashers page when this project is installed after 11 14 09!
"CLICK HERE to see the "Yard Crashers" Sacramento show!" with this feature installed.
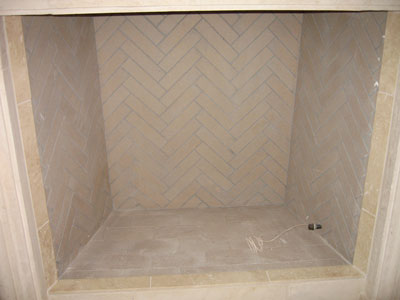
Do it yourself fireplace remodel made easy, or at least it seems that way.
First, the tile that was installed is not rated for fire. This tile would of popped off as soon as the fire was turned on. So do a little research before you begin. We can help in many ways, just call and ask.

It may have of seemed to be a good idea at the time, but it wasn't!

When redesigning a fireplace we suggest card board mache'. A card board mock up so you can see a basic preview of your project.


Below you can see the bottom, top and mantle in card board.


Now the rip and tear process begins!

Below we installed the extra electrical for the components and the TV. The components will be installed on the right side out of view with a black glass door. This will be installed later.

Below the framing begins.


Below we now added the Durock at the fireplace opening. This is key to the whole project. Math is very important when doing these layouts!


Below you can see the slate is being added.


Above and below the fireplace is 90% finished. The mantle needs to be installed and the door on the right to conceal the components needs to be installed as well. The inside of the fireplace will have 3 pieces of black galaxy granite installed. We will post these pictures of the fireplace when it is completely finished as well.

Now for the glass installation. We started with a satin black paint on the back walls, until we install the granite. Then we bulked up the base with 2" of white sand as this will save you a bunch of money! We used sand because we were pouring Starfire Base Glass in the fireplace. If we were to use a darker color of glass we would of used our crushed lava rock as a filler. When using sand, always make sure the burner is on top of the sand.

Test the burner/ location making sure the flames don't hit the walls.


Then pour the glass!


We added a few Pink Diamonds and then later added Ice Ice Ice Topper and Clear Diamonds. These products because of the way they are made appear to be melting on the inside.


The sealer that was used was a stone enhancer, not just a regular cheap sealer. When using rock you always want to see the beauty of the stone you are using.


As you can see the mantle is still missing. We have a few more details to still do and as soon as we have time to post the pictures, they will be here.
We encourage imagination to all of our customers and we support you and your projects. Regardless how simple or how creative. This is one of the elements that spawned our success and continues to do so.
Kentucky Fireplace Remodel
The next fireplace was built by Dave Luerman in Kentucky and you will now see his before and after also using a base of Starfire Base Glass.
Below you can see where it all began. Dave is one very creative customer.

The fireplace that was replaced was very nice but just met the needs of Dave.

Out with the old and lets frame up the new.


Add the durock panels.


Frame the Hearth


Install a triple 24" burner.


Add Starfire Base Glass and you are done.

The fireplace below is from Steve Calderon and he used a Starfire Base Glass with Gold and Bronze Rust Copper Base Glass on top.
This is from beginning to end.

Above is the before believe it or not. As you can see Steve did a terrific job. This was a wood burning fireplace before. he installed a gas line and control valve on the right side.


Below you can see the old burner which we replaced with the new double 18" burner.


Mask it, vacuum it after wire brushing the walls clean.


A bit of Thermolux 1200 degree high heat paint.

Fireplace Glass used:
Pour in a Starfire Base Glass with a splash of Gold Base Glass and Bronze Rust Copper Base Glass on top.


.

Then you have one nice fireplace, great job!

The fireplace below had a few issues, but easily repaired. Be sure to not let this happen to you! If anyone tries this type of installation, stop them and throw them out! This fireplace installation was in Palm Springs California. It was done with the 2" method which is fine except for the burner the fireplace shop installed. We will explain as we move forward and show you the finished fireplace.
Below is what we saw when we arrived.

Then we tested the burner we were to replace, oh my!

We uncovered to see what was installed and found a single pipe burner. Great Flame! Another issue was the paint job was hideous which was later repainted. Don't let these ignorant installer tell you their stories.They told the customer the paint would dry to match.

We do approve of a sand filler indoors under lighter colored glass, but the burner must be on top!


Now we installed a double burner and just watch!

Below is what they pawned off on the customer, DON'T LET THIS HAPPEN TO YOU!


Much better. Then we took several pictures of the fireplace just because! We did top it off with about 15 lbs of Starfire Base Glass to help hide the sand that was exposed and it worked out just fine.


The fireplace below has a steel pan underneath to conceal the 12 volt remote control. We used a Clear Base Glass and topped it with a Starfire Base Glass and then added Amber Diamonds on the surface.


You can see the front plate that was painted to match which is removable if and when necessary to change the batteries. The legs were 4 1/2" and the pan was 2" tall. The removable front metal curtain was 6 1/2" tall.


The next fireplace were installed in Malibu California. The master bedroom was on the third floor. We did a little paparazzi photo shoot while we were there. The glass we installed was 1/4" Starfire Base Glass.


The fireplace below is in Beverly Hills California. We used a Starfire Base Glass with Clear Diamonds and Black Luster Topper.


The fireplace below had a steel pan built so we could conceal the 12 volt battery operated electronic ignition
beneath the pan. The glass that was installed was:
Above and below you can see the solid cover as it hangs over the face to conceal the remote control ignition.

The fireplace below is in Palm Springs California. We used Starfire Base Glass over a 2"
bed of sand. We will narrate as we go:
Here is the fireplace with the screen removed


Now we remove the doors, very simple. One screw on each side at the top generally removes the doors.

Below, remove the end of the flex line and screw it on to the stub out coming out of the wall.

Below, now attach the flex line from the burner to the stub out. Keeping the flex line curled under the burner.

Below, pour in as much sand (on lighter colors) as you would like to raise the glass bed.

Look how easy! Even my installers can do it! Bring th burner to the top of the sand so it can operate properly. With crushed lava you can keep the burner below the surface. Keep your sand/ lava at least 3" to 4" away from the front!

Pour the glass and your done! Our typical install where we don't have to paint is about 12 minutes!


Looks awesome!

The 2 fireplaces below are
Claremont California.
The family room fireplace was filled with about 8" of sand under the
Starfire Base Glass. We installed a 38" "H" burner on top of the sand.

The fire pit below was purchased locally and then we converted it to burn propane without soot! The colors used were:
Starfire Base Glass,
Here is what is looked like when he started. These manufactures have no imagination!
This only cost about $100.00, complete!

The fireplace below is typical wood burning fireplace which we see every day. Once uncovered it looks like an incinerator. They are pretty nasty looking with out the fire burning. We like to show the before and after so you know what you really have.

Nice! Very Nice!

We had Starfire Base Glass installed with Ice Ice Ice Topper on top.


This next fireplace was done with lack of knowledge! First they installed a 18" single burner and some real interesting choices of glass. What they did do correct is have a 3" sand bed under their yuk glass. The first issue we repaired was the stub out on the left side of the fireplace floor. All we did was install a 90 degree elbow and connect a 1/2" flex line to the new double 24" burner. They had left the flex pointing in the air and then reduced it to a 3/8" line and to top that off added they very sad single 18" burner. We repainted their futile attempt (of painting) with dark metallic brown, added 10 lbs of sand and poured 75 lbs of Starfire Base Glass over the new burner and sand filler. We will explain as we move forward:


Below you can see the black marks under the paint.

Below you can see the flex line that was installed was left above the surface. Now if we tried that I think our customers would take us out and string us up, what do you think? To top it off this customer was an attorney! Completely happy with what we did.

Here is the new paint on the back walls.

Now we added the Starfire Base Glass. One thing we have been doing a little bit different is to bring the glass out from the front of the fireplace. We let the glass come out of the fireplace from 3 to 6 inches to make it look even more grand. What do you think?


Here is a the almost finished product of what we do! We left several colors with the customer to add. We will post pictures when they arrive.

Below are the finished pictures of what else was added:
Yellow Amber Topper,
Ice Ice Ice Topper,
Clear Diamonds,
Fuchsia Topper,
Purple Topper,
Red R Topper,
Roma Red Topper
I think it turned out very colorful! Check it out!


Just when I thought they couldn't do something different, they did! I agree with the sand as a base under the Starfire Base Glass. I will explain as we go forward:
I finally understood the weird brackets, he was calculating the height of his burner for sand filler underneath.

Above and below I understand testing the burner.


OK, I give, he taped the holes to prevent sand from getting in the burner. That doesn't really matter as too much sand really can't get inside and if it does, no big deal.


What I don't understand is the burner left on top of the glass. Didn't I show enough pictures for you to get the hint? No really? I guess he missed those few hundred pages of pictures.


If this is the look he was after, then he got it! Different strokes for different folks.

The fireplace below is a self installation by Thom Toben of Studio T2 Designs in Kansas. & colors were installed and they are;
Clear Base Glass with Starfire Base Glass mixed together over
Medium Amber Topping
Bronze Rust Copper Base Glass
Black Luster Topper
Yellow Amber Topper and
Turquoise Blue Topper
You be the judge, we think it looks great!

Below the burner is installed with the flex line under the burner

Now the lava goes in and the burner is brought up to the surface

Test the burner to insure the flame don't hit the back wall.

The Clear Base Glass and Starfire Base Glass was poured on top of the lava.

Then Thom placed all of the other selected to match the room.


The next fireplace was featured in MILWAUKEE, www.GMToday.com
Simply perfect
Contemporary in the country is a way to enjoy the best of both worlds
The family’s theater room takes on a contemporary flare with a stainless steel-tiled fireplace. Shards of glass replace artificial embers in the gas fireplace, creating a glow as the flames flicker. A large screen on a remote control is located above the fireplace, perfect for the family to watch a movie together.
 Picture by Doug Edmunds
"Click Here for the full article!"
The fire pit below was installed in Sydney, Australia by Ian Sutherland. He did a great job on his new patio and fire pit. We inspired him to build this really nice back yard project and we were glad to help. The glass that was used was Azurlite Base Glass and Starfire Base Glass.

The fireplace pictures below have a Starfire Base Glass, Gold Base Glass and Copper Blue Topper.


You have to admit, this is one interesting fireplace design!


The fire pit pictures below were taken by and for the Sweat Equity weekly HGTV Do It Yourself TV Show. The FireGlass that was installed was:
Starfire Base Glass,
Blue Diamonds,
Ford Blue Base Glass,
with an 18" stainless steel fire pit ring burner with out the center to accommodate the water feature. All of the fire glass was placed around the pile of fire rocks in the center. The top of the table is removable if you ever needed to service the water pump or any other reason. Always build and design it with replacement or repair in mind.
Now for the fire pit pictures:


Aquatic Glassel was used in this and every application.

There was an aluminum sub frame built with durock attached. Then the stone was applied to the surface. All of the components are under the removable top.

This episode will air on or around May of 2010 on HGTV and the DIY Network.


The picture of the fire pit below was taken in Newport Beach California. The glass that was installed was Starfire Base Glass. One very nice backyard and fire pit!

The fireplace pictures below show the before and after from Bob Kobus. The glass that was used is:
Let's go from start to finish:
Nice Logs! NOT!
Bob used an aluminum brick metalized panel.
Then they did their grind pattern.
And here you have it finished!
Yes the logs will be leaving very soon!
Much better, don't you think?

The fireplace pictures below will show how simple and easy it actually is to install.
Here are a few comments from J.D.Harriman
John. Harriman@dlapiper.com
Subject: More proof of how easy it is to do with Moderustic providing the materials!
We are so happy with our FireGlass fireplaces (we have 3!). It has literally changed our lives in that we can use our fireplaces anytime we want with no worry about
cleaning ashes later on. Even better, the look is so superior to fake logs. All of our friends have been wowed by the look. We always send them your way.
Best regards,
J. D. Harriman
Here we go:

Above you can see how nice it WAS! YUK!
Below they painted, we always recommend painting the lines first and then painting each brick separately. Using this technique you can eliminate spots.

Install the burner. We usually recommend curling the flex line from underneath, but this works as well if your flex line is long enough. The reason for the flex line: it allows you to move the burner forward to prevent the flames from hitting the back wall.

Below the lava has been poured and test the flame pattern.

Pour the glass from the front going to the back. You can use a cup or pour from the bucket.

Turn it on and you are done!

The glass that was used is:
Starfire Base Glass,
1 lb of Gold Base Glass,
Amber Diamonds,
Ice Ice Ice Topper for one simple but nice fireplace!

The fireplace below belongs to Deborah Hawkins and she installed a bed of crushed lava and topped it with with Black Base Glass, a few lbs of Starfire Base Glass and about 1 lb of Copper Ruby Red Topper.


Direct Vent Conversions! (Direct Vent page)
Yes these can and able to be converted!
How to make "THIS"
(Click below to see how we did this!)

Into "THIS"

____________________________________________________________________________________
From here:
From nasty to BEAUTIFUL in an hour!

To here:

______________________________________________________________________________